Showing posts with label weft. Show all posts

Monday, December 21, 2015

Time Out

Attended a Christmas gathering yesterday dressed in purple instead of our typical ugly Christmas sweaters.  I took the opportunity to wear the brand new cashmere sweater that was a gift from my lovely, talented, great shopper daughter-in-law and son.  Yes, she comes first because she found the sweater and knew I would love it.  A special thank you to them.

Back in the studio work continues on the new kit.  We wanted to add a scarf kit to our popular towel/placemat/table runner kits we feature in our Etsy shop.  I am weaving as fast as possible to complete the sample and am concerned about my weft picks per inch.  I believe I am going to run out before I complete weaving the 78" needed for a finished size of 66".  I calculated the weft based on 10 picks per inch (ppi) and I keep measuring as I weave.  I'm going to double check my calculations on my project sheet before I return to weaving.  I am also going to measure my ppi again and see where I am.

New photos of the sample to follow soon.

Wednesday, December 16, 2015

Something New

Close up of project on 16s Toika
Napkins being woven on 16s Toika


I am trying something new.
Both looms currently have projects on them and I am going to write a blog post daily about the things I know best.  After weaving for more than a decade, I have learned many lessons.

1.  Keep records.  I have used several different project planning sheets, some found online and other from classes I have taken.  As a result, I have created my own personal planning sheet to include the calculation that are important for my planning process.  I start every project, even samples, by recording my project plan.  It includes all the information about the warp, weft and finished project.  I calculate my warp length and the total yards of warp yarn required to weave the project.  In addition, I calculate my ppi (picks per inch) and the total yards of weft yarn required to complete the project.  If I am uncertain about how much yarn I have in the color I plan to use, I will weigh it and calculate the yards on the cone.

2. Sample.  Include at least 18-36" of warp yarn for a sample when calculating the length of your warp.  Make certain you include enough warp to take the sample off the loom when it is complete and tie the warp back on the front apron rod.  My first samples neglected to include at least 6-8" for retying after removing the sample and I almost ran short when weaving my final project.

3.  Be willing to make changes in your sett and ppi based on the results from your sample.  In fact, be willing to change your weft yarn altogether.  Your sample should include weaving with several different colors to be certain you have chosen the one you like best.  If you change the sett of your warp, you will need to resley your reed.  If you choose a different size weft yarn, recalculate your total needs on your project planning sheet and check to be certain you have enough yarn.

When it comes to project planning, the most important single lesson I have learned is to be open minded.  You may have conceived of your completed project one way and your experimentation on the loom may take you in a different direction.  Make sure you leave enough warp length to sample each idea and be willing to try different things when you sample.  It will lead to the best possible result.

I could bore you with several stories of how I started with one idea, ran out of yarn or found a different way to do it when sampling and those things led to a different result.  Your sample is a time to have fun and try crazy things.  Don't dismiss anything, try it all.  Save your samples and file them with your completed project plan and a snip of the finished project if you can.

I'll write more about the pictures at the top tomorrow.  The planning was fun!

Tuesday, September 22, 2015

The Wrap Whizzes off the Loom


I have filmed several of our completed wraps as I remove them from the loom.  I've enjoyed watching the fabric come off the cloth beam and seeing it piled up on the floor in front of the loom.  This time is a bit different.  I admit, I've never worked this quickly in my life OR I may have pushed the wrong button when I filmed myself removing the baby wrap from the loom.  Once it's off there are no "do-overs".  Before I began filming, I spent 15 minutes testing the camera and making certain I positioned it correctly on my new tripod.  Then, I pressed the wrong button or something when I set it to record.  Actually, I think it's more fun this way.

Let's go back to the beginning.  This wrap, which we have titled Home to Oregon, was designed from a poem written by our client.  You can read the poem here.  She explained more about the poem in her blog post.  

The center of the wrap is marked with blessing threads that represent the flight of the mallard ducks over a pond.  The color yarn was chosen to represent that vibrant turquoise that appears on the mallard's head.  You can scroll down on this page and see a nice color photo.  


The wrap is almost done.  Janet is taking a close look at every thread to check for any minor treading errors.  Once these are repaired, the wrap will be hand washed, hemmed and mailed to our client.  I will be sad to see it go.  This one is a beauty.


Saturday, February 7, 2015

Time Does Not Pass Slowly

Gramma's Garden

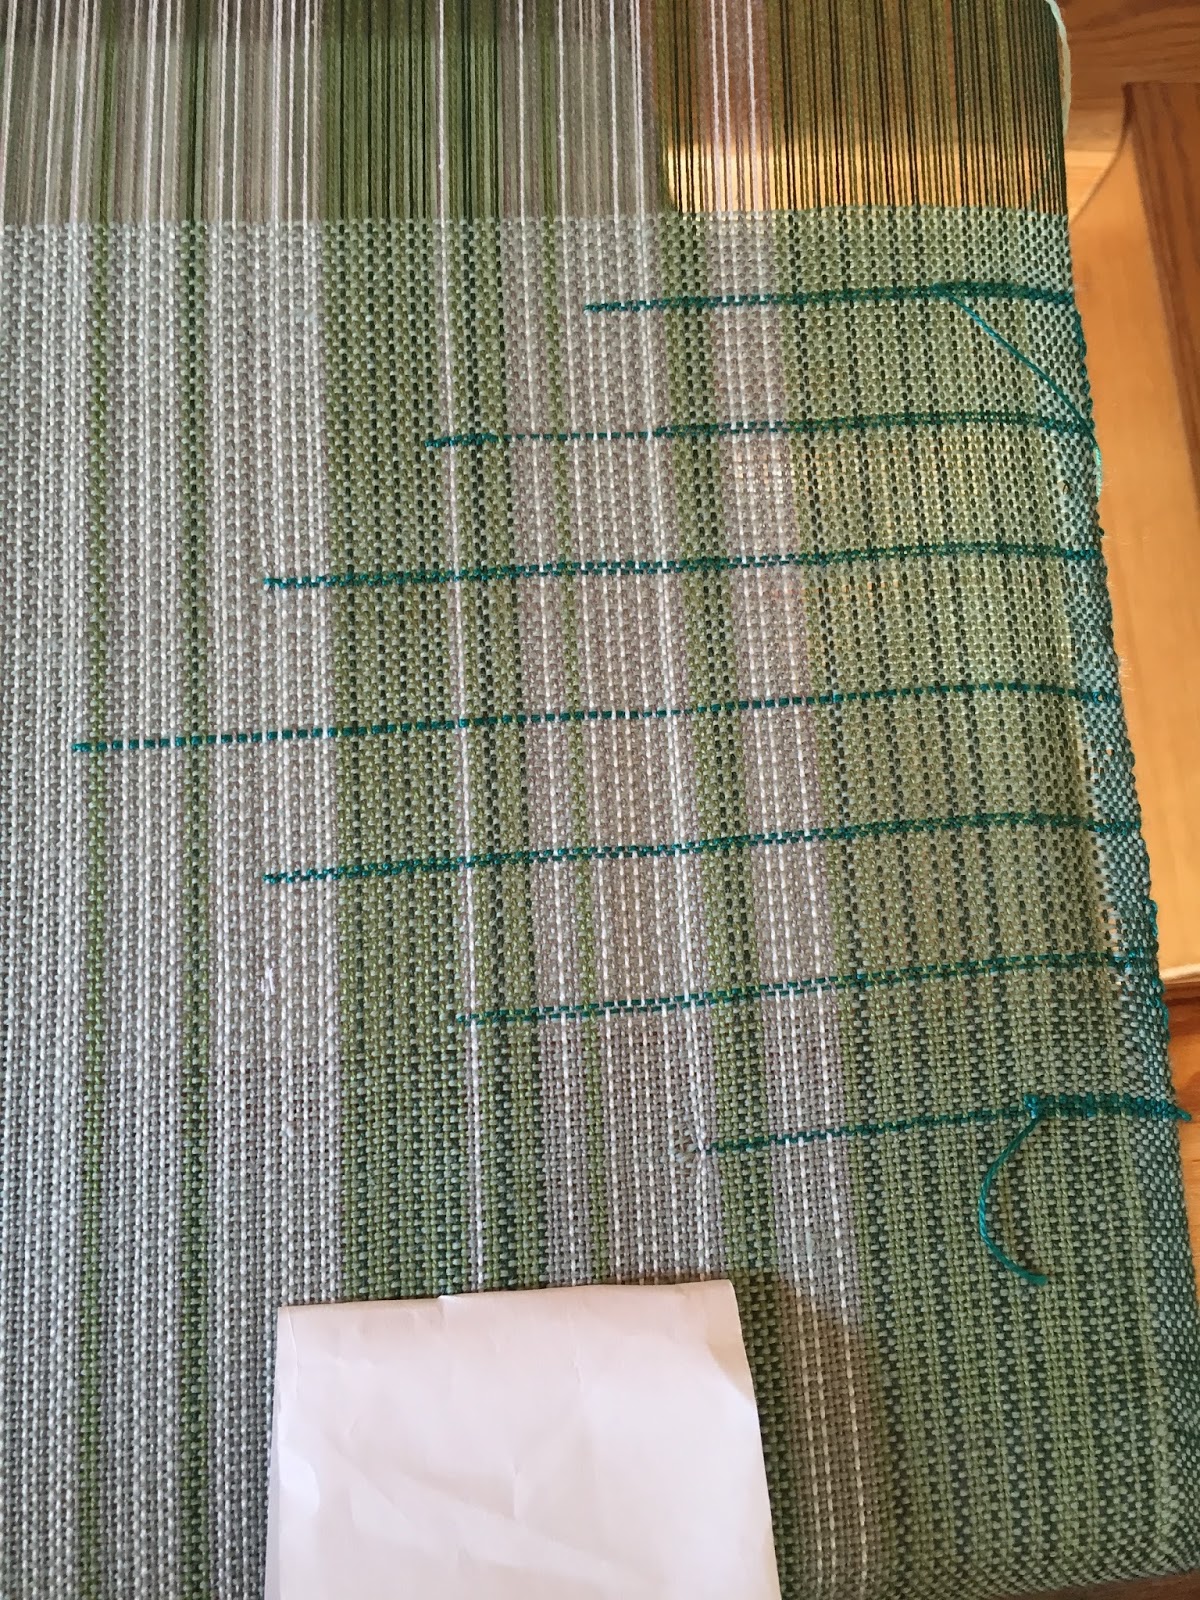
Currently on the loom is Gramma's Garden,    I love the way plain weave allows the warp colors to shine.  The red/orange weft brings an unexpected warmth to the whole warp.

This custom baby wrap represents many firsts for us.  Until now, Janet has designed every wrap we have made from a photo and/or working closely with our clients to develop the design.  She creates a mock up by wrapping the various colors of yarn on a 1" wide piece of cardboard.  She then winds the warp based on the mock up and any changes the client may have requested.  Here are a couple of mock ups and final wraps.

Awakea


Dark Shadows


Dreamland


Mock up for Gramma's Garden

The design for Gramma's Garden was created by our client.
In addition, she chose a wool/tencel blend yarn for the weft.  This is a departure from our usual all cotton baby wraps and has been welcome change.

The mock is the beginning and the finished wrap is the end.  There are many hours of work in between.  Janet winds the warps which are usually 12-14 yards long and over 800 threads.  She divides the warp into 3-4 bouts or sections and winds each separately.  From there, we wind the warp onto the loom and I thread it, sley the reed and weave a sample using various colors of weft for the client to choose the color they prefer.  This sample is removed from the loom, measured and wet finished.

In the case of Gramma's Garden, I wove a small sample, removed it from the loom as usual and measured it carefully.  I divided it into 4 separate pieces and wet finished each piece differently.  Two pieces were machine washed, one in cold water and the other in warm.  Both were then dried on the low setting in our dryer.  They had the greatest percentage of shrinkage but it was not a huge amount.
Next, I hand washed two samples, one in cold and the other in warm and air dried both.  I expected the hand dried sample that was washed in warm water to also shrink a great deal and it did not.  This experiment indicates how I need to wet finish the wrap when the weaving is complete.

Once the samples are dried, tested and measured, the weaving begins.  When the weaving is done and the wraps are removed from the loom we inspect them for skipped threads, small flaws, etc.  Every thread, warp and weft, is carefully inspected and any small flaws (mostly skipped threads) are repaired.

The final steps are the hem the wraps and wet finish them either in the washer or by hand.  We iron every wrap, inspect it again for any skips, repair the skips we missed earlier, iron again and the wrap is DONE!

Yes, it's a long process and we never tire of doing it.
Thanks for your support, thanks for reading this far into the post and have a great day!

Claudia and Janet
The Lotsaknots Team
Our Facebook page
Our Easy Shop (we have 2 wraps for sale)
Our website


Friday, June 27, 2014

Stormageddon and Dark Shadows All Done

Stormageddon middle marker

I enjoy taking of video of the wraps coming off the loom when they are done.  Here is the most recent custom wrap and a sister as they exit the loom.
As I say in the video, this has become tradition for me.  The weaving is done, the loom is empty.  Now, on to the finishing touches.

Happy weaving!

Friday, May 16, 2014

The Dream is Over

The warp has now been woven into web which, when wet finished, will be 2 baby wraps.  Dreamland is a custom wrap designed by Janet and based on this photo.
Dreamland wrap inspiration
We wound a warp long enough to weave 2 wraps and they are now off the loom.  Here's a brief video showing the wraps coming off.
The finishing phase has begun.  The hems have been sewn on both wraps and Janet is examining them very carefully for any errors that can be repaired.  Once she completes the repairs, the wraps will be measured and wet finished in the washing machine and dried in the dryer.  We will give them a hard press, measure them and post the sister wrap for sale in our Etsy store once the custom wrap has been sent to our client.

The next warp is wound and I will take photos while I prepare it for beaming on the loom.  
One warp ends and another begins,  On to Stormagedden!  


Monday, April 14, 2014

Technical difficulty delay

We wished a fond farewell to Haleakala and Awakea.  They are both off to new homes far, far away.  One is taking a long trip to Alaska via Ohio and Michigan.  I encourage everyone to keep their address on their Paypal account current.  It helps businesses, like ours, to send your purchases to the correct address.


The sample is completed for Dreamland which is the next wrap on the loom.  It will have one sister wrap.  After completing the sample weft for the client to choose her favorite and decide on a middle marker, we ran into several problems.  The most difficult issue was the front apron bar which had
gotten caught in its own strings which run over the knee beam and attach to the cloth beam on the front.  This caused all sorts of tension problems and the 2 feet that had been completed were removed, the apron rod was attached more effectively and weaving has begun again today.

We hope to make good progress now that all technical difficulties are repaired.  We lost a few inches of warp which means the sister wrap will be 3.3 or 3.2 meters in length.  We'll do a hand embroidered middle marker on the sister wrap.

I'll keep you posted on progress.  I get wrapped up in weaving and don't get to the computer to post very often.

Happy weaving!

Thursday, February 6, 2014

It's a blessing!

I enjoy weaving baby wraps and feel lucky we have a waiting list of mamas who want custom wraps from Lotsaknots.  We have worked out our own little "production line".  Janet, who has an amazing innate sense for color, does the initial design and works on a mock up of the wrap.  The mama chooses a photo or picture for inspiration and Janet works with her on the warp design.  Here is an example of a mock up and the final wrap.
Janet winds the warp and together we beam it onto the loom.  
I take over and thread the warp, weave a sample and consult with the mama on the weft color.  I do the weaving and the finishing.  Janet jumps in at the end to correct any weaving errors such as a skipped thread, and I do the wet finishing and ironing.  We have it worked out and it's going well.

I was recently asked to add blessing threads to the wrap that is currently on the loom.  It's the sister wrap to the Wizard of Oz Competition of Weavers wrap.  This one is called "Follow the Yellow Brick Road".  Here's a video of the wrap and the blessing threads.


See you soon,
Claudia and Janet
The Lotsaknots Team

Saturday, January 25, 2014

It's a threesome!


In my last post, I removed three baby wraps from the loom.  It took a couple of weeks to complete the repairs, sew the hems, wet finish, iron and repair again all three baby wraps.  Two wraps were 3.7 meters long and one was 3.4 meters.  We go over each one very carefully, several times to be sure we find and repair all weft skips or weft threads that erred in the path from one side of the wrap to the other.  It's tedious, time consuming work.  But our wraps do not leave here until they are as perfect as possible.

Well, the Sedona/Solace triplets were boxed and sent to their homes yesterday.  Here is a short video of one of the completed wraps.


In addition, we entered a Facebook Competition of Weavers where everyone wove a wrap inspired by the Wizard of Oz movie.  We chose to make a fibonacci sequence representing Dorothy's trip along the Yellow Brick Road to the Emerald City.  Janet wound the warp while I was busy weaving the previous 3 wraps.  We beamed Yellow Brick Road and I finished weaving the day before the wrap was due.  Thirty three people entered the competition in the fall and we were 1 of 11 who completed their wrap in time for the anonymous judging on the Loom to Wrap page on Facebook.

Here's the completed Follow the Yellow Brick Road:

 We've been pretty busy and now the loom is prepared with the sister wrap to Yellow Brick Road and Janet is winding the next custom wrap.  I'll be posting about that one as it goes on the loom.''We have a new system for beaming the warp and it's working much better.  Ten years of weaving and I'm still learning!!


Friday, December 6, 2013

A view of the Lotsaknots Studio

For the past few weeks I have focused on the long warp on the Glimakra Standard that will be 4 baby wraps.  There is a lot more going on in the studio.  I've put together a quick video tour of the some  other projects.

The warps are all designed and wound by Janet who has a fabulous eye for color.  The Sedona wraps that are currently on the big loom was designed by Janet using a painting of Sedona, AZ.  We were visiting Sedona in September and walked into an art and sculpture gallery where they featured the painting Janet used for this warp.  She is very talented and has a great feel for color which can be seen in this and all the warps we produce.

BTW, Janet is the other half of Lotsaknots.  She is a knitter, spinner and occasional weaver.

Enjoy the video:
This warp is featured in our Etsy shop.
Please add your "Like" to our Facebook page.  

Sunday, August 25, 2013

And the beat goes on

The studio has been buzzing with many changes and lots of news.  Our Etsy shop has been flooded with unusual requests lately.  It started with a request for a baby wrap, a shawl warp (on the warping reel on the left), more baby wraps, baby warps and it's been fun sorting it all out.

My children (who are now in their 30s) all spent part of their infancy in packs and wraps of various sorts.  The goal was to be able to have hands free and offer comfort.  I often used one to get housework done when the boys were infants.  They both found vacuuming noise very soothing and fell quickly asleep in the pack/wrap I borrowed from a friend.  Baby backpacks were common in the 80s and wraps were rare.

It seems that wraps are very "in" right now and hand woven ones are considered the best.
 I'm thrilled.  I love weaving long pieces that enable me to thread and warp the loom once for a long project.  I was very excited when we received a request for a baby wrap and very surprised when i discovered how many weavers are making them.  Many of my contemporaries have changed the focus of their business to producing nothing but wraps.  One friend has a waiting list from now until Summer 2014!

I'm studying all the ins and outs of this new field of weaving while I work on my first wrap.  I'll keep you posted as we progress.  Threading the loom starts tomorrow.  

Friday, June 22, 2012

Spreading the Love

Here I am in Columbus, OH to spread the love of spinning and weaving. Why Columbus? It's the annual TNNA (The National Needlearts Association) Trade Show and Spinning and Weaving is a fledgling group in this land of yarn, needlepoint, counted thread and accessories. We (the Spinning & Weaving Association) joined TNNA almost a year ago and need 100 members of our group to become a voting member of the association. We have 97!

I will be meeting yarn and fiber wholesalers to invite them to join us and introduce them to the joys of spinning & weaving. I have 3 days to find 3 or more new members and help demonstrate weaving and spinning on the Trade Show floor. Sounds like a great way to spend a few days.

Meanwhile, back home, I am working on new samples for the upcoming class. I plan to expand the curriculum to include lace weaves, warp and weft floats, and other pick-up stick tricks for the rigid heddle loom. The next class starts July 14th and meets for 3 Saturdays, July 14, 21 and August 4. We'll spend most of that time working on planning projects, warping and dressing the loom. These are the most important pieces to being able to weave on your own. Weaving is the "easiest" part. I put that in quotes because learning a new craft is never easy. It takes practice and a certain amount of devotion to learn to weave. But there is so much more. To get to weaving, you must be able to calculate how much yarn is needed and determine if you have enough. Then, you need to get the yarn on the loom properly and thread the heddle, tie it on to the front apron rod and then the weaving begins. What can you expect in a class? We start with weaving and learning the language of weaving the first day. With shuttle in hand you throw the weft pick across the warp and begin to create your sample. Once we spend some time learning how to place that weft pick in the shed (several new words for some), I demonstrate the planning process and work with each student to plan their first warp. Unlike using a floor loom, you direct warp a rigid heddle loom. A very different and faster process. You create the warp right on the loom, wind it on the warp beam and then thread it through the holes in the heddles. The direct warping is done through the heddle slots and, once beamed, we need to thread through the holes. The tension needed to weave is created by tying the warp onto the front apron rod which is tied to the front beam. All this is covered in the first class.

Weaving is a complex craft. It is not easy to learn but it can be very rewarding. The cloth you weave can be a scarf or shawl or you can use it for fabric to create a top, jacket or skirt. You are weaving fabric and can do so on any size loom. A 15" rigid heddle loom can produce 13.5" wide fabric which can be used for fabric to create a jacket. Sew two 13.5" pieces together and you have the jacket back. Two more lengths of fabric and you have both fronts. Add two more pieces for sleeves. All on a rigid heddle loom. You can make a jacket as easily as you can make a few scarves. It's just that simple. It's all in the project planning which we will cover in the first class.

I hope to keep reporting from Columbus. I believe it will be very busy starting later today so my posts may be short. There has been a big increase in weaving and spinning. Schacht has 21 looms each with a different scarf placed around the trade show floor. Each scarf was made using the yarn from a different wholesaler and can be found at that wholesaler's booth. I will take pictures and share them here.

Be back soon. Claudia